Windows System Image Recovery
Your factory installation of your Windows operating system, including any custom software installations and hardware drivers, is recoverable from unforeseen events such as viruses, unstable software downloads, and hard drive failures, and is included with your PC.
This recovery image is located on the SAMPLES drive in your PC, in a folder labeled “WindowsImageBackup”.
This folder does NOT need to be moved from this location to follow the process outlined in this article. Leave the folder in its original location, on the Samples drive.
Please DO NOT Delete this folder! If you delete it, you will lose your recovery image and you will be unable to recover your PC to its state when it was built by PCAudioLabs.
It is also advised to make a secondary backup of this WINDOWSIMAGEBACKUP folder to a hard drive not in your computer, such as an external backup hard drive kept in a secure place.
In the event of a data loss, Windows issue, or other system issue, the PCAudioLabs Restore Image can be used with your existing or a new hard drive to bring your system back to the way it was when you first received it.
Note the following:
You will lose all files on the OS hard drive that were written to it after the system arrived to you.
Your system will be refreshed to its original state, as it was when it was built for you, or the most recent backup image that you've created.
You will not lose files on your other hard drives, but it’s good to back them up.
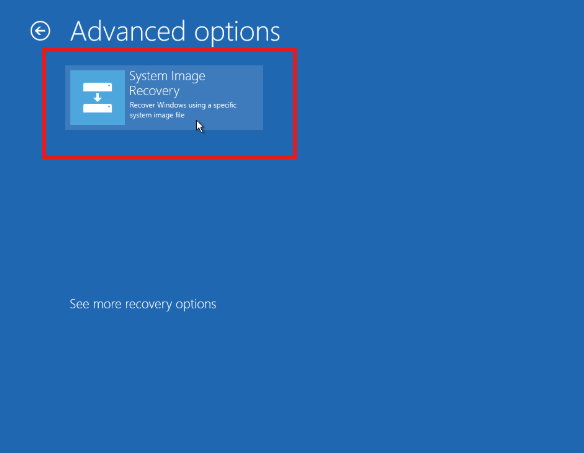
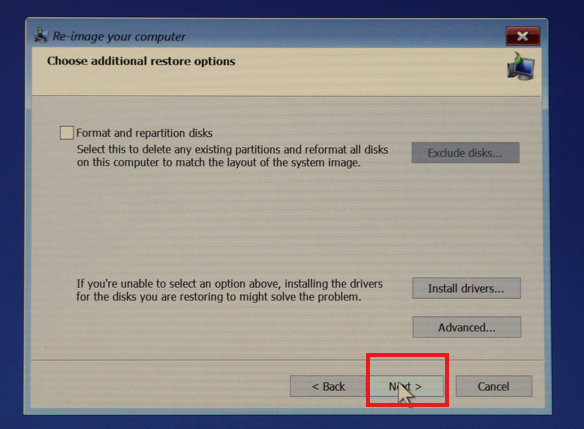
To restore your Rok Box to its factory settings (when your computer was built for you):
If you did not opt for this drive to be included with your PC, create a Windows USB recovery thumb drive as outlined in this article: https://obpcal.freshdesk.com/support/solutions/articles/69000862172
With that USB thumb drive in hand, follow these steps.
Start with the PC powered-off.
2. Power-on the PC.


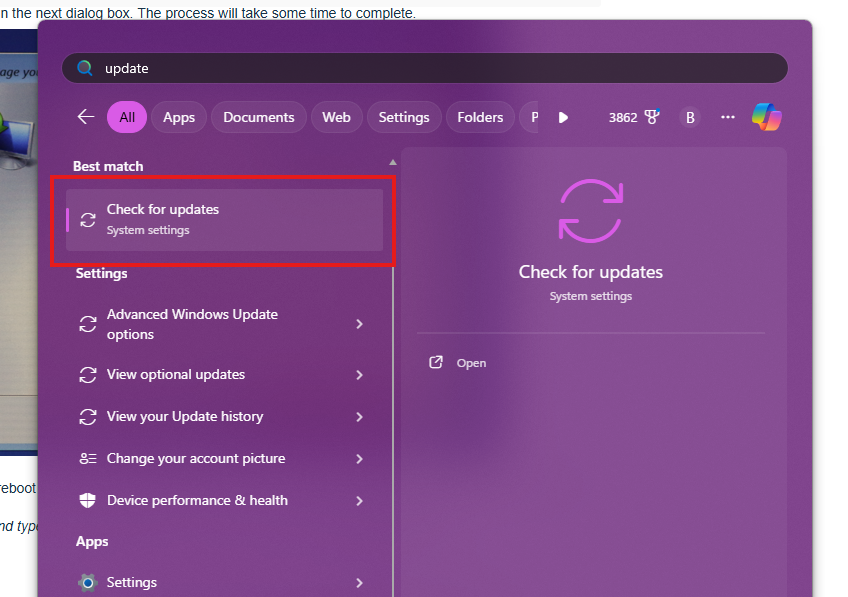
15. Click Check for Updates, and allow Windows Update to download and install available updates.

16. The PC may need to reboot after installing updates.
We advise that you perform a Windows Image Backup of your computer after you have received it and installed all your necessary applications. See instructions HERE.
This article was last updated on 11/05/2025.